Our customer service team in the US is ready to assist you.
1-877-992-5474 Available Now
Monday - Friday
7 AM – 4 PM PT
Saturday
7 AM – 4 PM PT
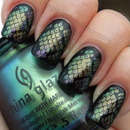
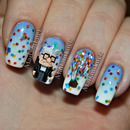
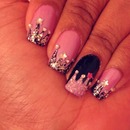
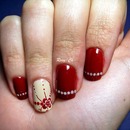
DIY nail art stickers, Nails and nail art. In this easy DIY nail art stickers tutorial I will show you easy nail art designs and how to make your own nail art designs into stickers at home! Five different nail art design to decorate your nails. No nail art tools needed to make DIY nail art stickers designs.
Show More
DIY nail art stickers, Nails and nail art. In this easy DIY nail art stickers tutorial I will show you easy nail art designs and how to make your own nail art designs into stickers at home! Five different nail art design to decorate your nails. No nail art tools needed to make DIY nail art stickers designs.
Step by step guide for nail art designs that work on long or short nails!
Nail art stickers are a great idea if you love nail art, but struggle to keep your hand still while doing your nails and nail art designs. Nail art stickers brought from the store can be expensive. But you can make your own easy nail art stickers and can create any designs you like for your nails.
In this DIY nail art tutorial I will show you different ways of using nail art stickers. You can use the entire nail art sticker or cut them in to shapes and stick them to your nails.
DIY nail art stickers are really quick to apply to your nails and go onto the nail dry, so no drying time is needed once the DIY nail sticker is already made.
To make your own fun and easy nail art designs into stickers and create pretty nails, all you will need is a plastic bag or some parchment paper and nail polish in various colours.
When you make your own nail art stickers you first need to decide what nail art designs you want on your DIY nails art stickers/decals. The possibilities are endless, have fun with this cute easy nail art and be creative.
Firstly take your sandwich bag and paint on thick layers of nail polish into one inch (or bigger) rectangle shapes. Make the nail polish rectangles bigger than your natural nails, you can trim it to the size of your natural nail later. Add three or four thick coats of nail polish. It's important to apply the nail polish thickly so your nail art stickers don't tear when you remove them from the sandwich bag. Wait for the nail polish to fully dry before using nail polish to draw your nail art designs onto your DIY nail art sticker. Your nail art sticker needs to be fully dry before you remove the nail art from the sandwich bag. Once you've removed your nail art designs stickers you can put a coat of clear nail polish on your natural nail and apply your nail stickers. They are easy to apply and you can trim (peel) the edges off the nail art sticker once it's applied to your nail.
Making your own nail art stickers means you can create cute and easy nail art designs at home. And you can do any nail art designs you like!
Which nail art designs you create is up to you.
TIPS for making your own DIY nail art designs stickers-
Use fast drying nail polishes if you have them. Regular polishes take 1-2 hours to dry on the plastic bag.
If you don't use your DIY nail art designs stickers for a while they will become dry and brittle. If this happens use a little bit of clear nail polish on the back of your nail art sticker before applying it to your nail. This will help soften it.
Use thick coats of nail polish. This will prevent your sticker from tearing/crumbling.
Always use a base coat on your nails before applying nail art stickers.
Do not use aluminium foil to make nail stickers, it won't work!
Peel your DIY nail art sticker off the sandwich bag from one corner, be gentle otherwise it may tear.
I hope you enjoyed this tutorial and have fun making your own nail art designs stickers at home.
For more nail art designs you can check out my Instagram :)
Instagram - http://instagram.com/kaiteyray1
Show Less
Oct 12, 2014
Sarah L.
Great video Kaitey!
Oct 10, 2014
SaraBeautyCorner S.
Good job, Kaitey :)
Oct 12, 2014
Kaitey R.
Oct 10, 2014
Lila A.
COOL!! :)
Oct 10, 2014
Kaitey R.