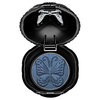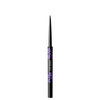
Have you heard about the latest Target and Missoni collaboration? We were so excited about the September line that we created our very own Missoni-inspired chevron manicure. Since this design is a little more complex and time-consuming (everything is hand-painted), but if you've got an hour or so to spare this weekend, practice your nail-art technique and give this runway-ready striped style a go.

What You'll Need
-
(Not pictured: Duri Rejuvacote Base Coat, Seche Vite Top Coat, and thin art-store paintbrush)
Step 1
PREP AND OUTLINE
First, study how you want to lay out your chevron shape. We decided to reverse the arrow direction on each hand. In broad, even strokes, apply a thin layer of any base coat you like. Use a thin art-store brush to apply your first chevron shape. Choose a nude polish to serve as an outline for your other stripes. If you mess-up the line, a nude shade will be easier to fix than a brighter color.

Step 2
APPLY FIRST COAT
Paint on adjacent stripes with your various colors. It might look a little splotchy and uneven at this stage, but don't worry about those details yet—you're just priming the design. To get the look pictured, make the stripes point in opposite directions on each hand.

Step 3
FINISH FIRST COAT
Paint the last two colors on the cuticle and raw edge of the nail. Again, don't worry about minor mistakes, you'll clean those up later.

Step 4
APPLY SECOND COAT
Now it's time to sharpen those lines. Go over your stripes again, taking care to create an even opaque line. [Editor's note: We used Orly Sweet Lemonade as a base for OPI Need Sunglasses to make it pop more!]

Step 5
CLEANUP AND TOP COAT
Clean up excess polish on the sides of your nails and make any final touches. Since the stripes are so close together, give your nails an extra 15 minutes of drying time before applying the top coat, otherwise the colors will bleed.

Featured Products
-
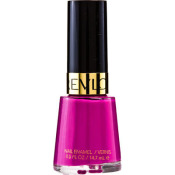
Revlon
Nail Enamel
/ 60
-

OPI
Nail Polish
/ 209
-

Zoya
Nail Polish
/ 50
You Might Also Like
-

Tips & Tricks
Tips for Maintaining Bright Hair Color
- 788
-

Celebrity Looks
Which Bright Lip Is Best For You?
- 132
-
Nails
Harry Potter Nail Inspiration
- 119
-
Nails
Your Best Manicure Tips
- 144
-

Hair
Beach Hair Styling Tips
- 790
-
Skincare
Spring Storage Solutions Part 2: Skin Care & Fragrance
- 170
-

Tutorials
Pretty Everyday Makeup
- 254
-
Tutorials
How To Do a Sock Bun
- 8624


