The Royal Wedding is almost here and Beautylish is counting down to the main event with Prince William and Kate Middleton-inspired beauty coverage all week long. To celebrate the upcoming nuptials, Beautylish created an easy, elegant, and royally-inspired manicure. See how you can take nude nails to the next level with some finger bling inspired by the royal ring!
What You'll Need:
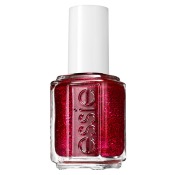
- Essie Nail Polish in Mademoiselle
- Essie Nail Polish in Happily Ever After
- Duri Rejuvacote Base Coat
- Duri Miracote Super Fast Dry Through Top Coat
- Small Royal Blue and White Rhinestones
- Orange Stick (found at your local beauty supply store)
STEP 1 Base Coat + Color

Apply a thin coat of your favorite base coat on nails and wait for them to dry for 3-5 minutes. To give pale nails more dimension, apply two coats of the same shade but with different textures. We used Essie Happily Ever After (a pearly sheer pink) to nails first, then Essie Mademoiselle (a sheer cream pink), allowing 3 minutes drying time between each coat.
STEP 2 Apply Rhinestones


To give your ring finger the royal treatment, embellish your nails to resemble Kate Middleton's gorgeous sapphire and diamond engagement ring. Orange sticks are a great tool to apply the small rhinestones, and they're available at your local beauty supply store. Brush a tiny amount of topcoat on the orange stick and grab each rhinestone individually. Since your nails are still tacky from the polish, the extra top coat will act as adhesive. If you're really concerned about staying power, use Krazy Glue instead of top coat on the orange stick.
To create a heart-shaped version of Kate Middleton's ring, start with three blue rhinestones in the middle. Use the orange stick to maneuver the gems exactly where you want them—start building your design in the center for a symmetrical look. While the polish is still wet, gently press down on the rhinestone once you're happy with the placement. Border the blue with a silver or white outline, just like Kate's ring!
STEP 3 Top Coat

Once everything is dry to the touch, apply your top coat. Make sure to properly seal the the rhinestones for lacquer longevity! We hope you enjoyed this tutorial—celebrate the Royal Wedding this Friday with these fun-yet-sophisticated nails.
Here's some more Royal Wedding goodness:
Royal Wedding Nail Decals Take your Anglophilia to the next level with these Will & Kate inspired decals.
Royal Wedding Minx Nails We're not sure if these are a joke or not, but take a look at yet another royal nail decal from the Minx team
Royal Wedding Scents and Lip Gloss Get hygienic hands like a true Brit with these UK inspired sanitizers and lip glosses—what will they think of next?
Jemma Kidd on Kate Middleton's Wedding Beauty Jemma Kidd gives us the scoop on her beauty predictions for Kate's big day!
butter LONDON No More Waity, Katie Nail Polish butter LONDON mixed this royally inspired greige lilac infused with regal purple glitter.
butter LONDON No More Waity, Katie Lip Gloss Calling all Royal Wedding followers! butter LONDON just released a companion lip gloss to their limited edition lacquer, No More Waity, Katie.
The Secret to Kate Middleton's Shiny Hair Kate always looks amazing—what's her secret? Find out what hair products she can't live without!
Hairstyling secrets from William & Kate, the movie Okay, we know it's not the actual royal wedding, but the Lifetime network comes pretty darn close with William & Kate! Find out how the actors got perfectly regal hair for the royal center stage.
Featured Products
-
Essie
Nail Polish
/ 350
You Might Also Like
-
Expert Skin Care Advice
Dermatologist Shares Her DIY Skin Care Recipes
- 1871
-
Celebrity Looks
Kate Middleton's Bridal Beauty
- 26
-
Hair Tools
Tousled Hair How Tos
- 1001
-
Bridal Looks
Bridal Beauty Tips
- 146
-

Eye Liners
Eye Liner Techniques
- 475
-
Skincare
Spring Storage Solutions Part 2: Skin Care & Fragrance
- 170
-
DIY
DIY Lemon Beauty Recipes
- 1113
-

Tutorials
First Day of School Tutorial
- 192


